
How Ice Balloons™ Work
A Simple Process For Long-Lasting Ice Without the Hassle
Ice Balloons™ are designed to be as easy to use as they are effective. The process is simple: fill with water, tie securely, freeze flat, then bust when you're ready to load the cooler. Each balloon is engineered to hold between 15 and 20 pounds of water, creating solid ice blocks that break into varied chunks for better cooling performance. Whether you’re prepping for a road trip, fishing day, or weekend getaway, following the steps below ensures your Ice Balloons™ freeze properly and last longer.
Step 1: Fill the Balloon
Use Cold Tap Water for Best Results
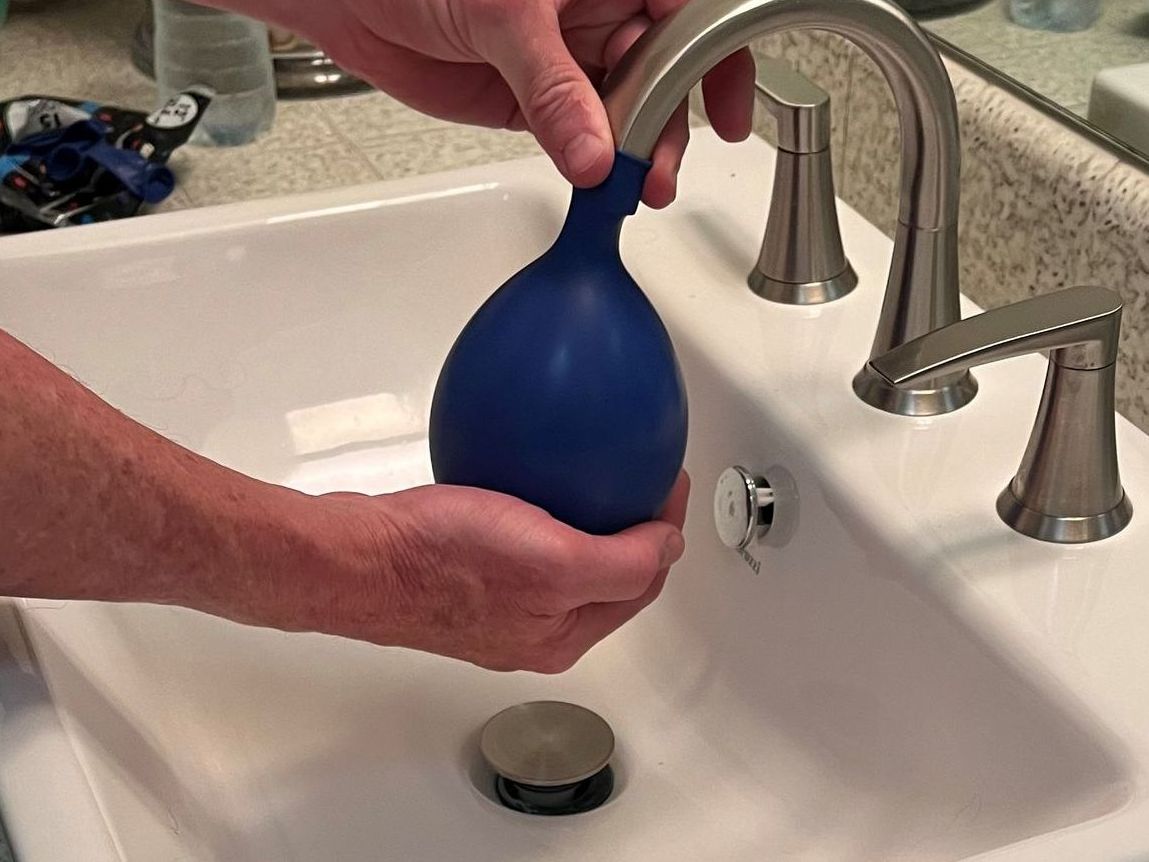
Start by stretching the thicker Ice Balloon™ slightly to make tying easier later on. Then, use cold tap water to fill the balloon directly from your sink, garden hose, or faucet with an adapter. While filling, hold the mouth of the balloon on the sink nozzle and support the balloon at the bottom. You’ll want to fill each one until it reaches the desired size, usually about the size of a standard basketball. Avoid using warm or hot water, as it can weaken the balloon’s outer layer during the freezing process. Do not overfill, as water expands upon freezing.
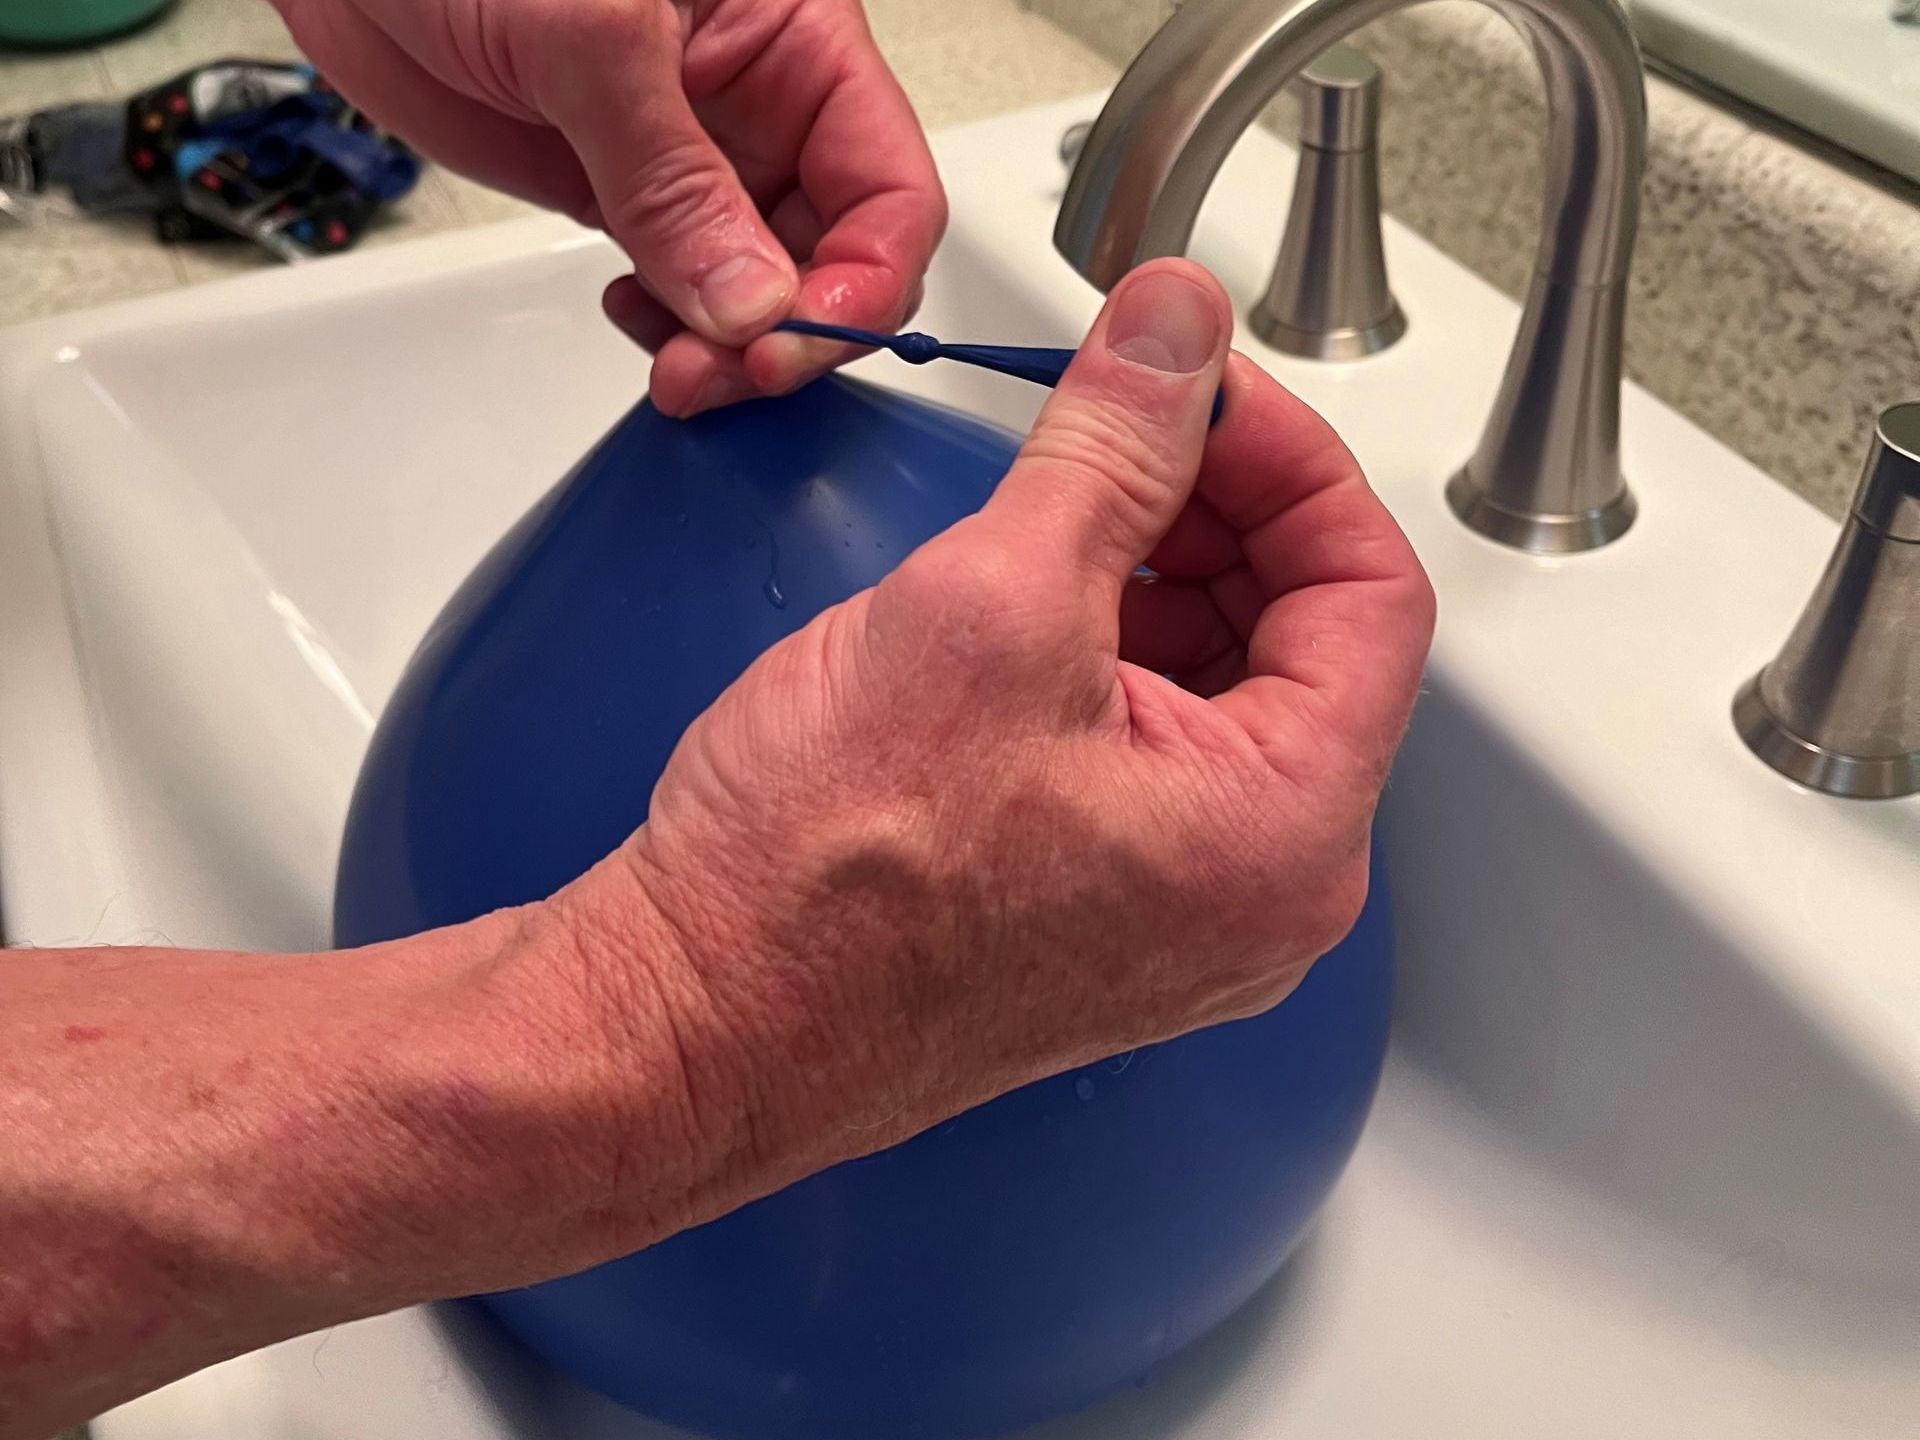
Tie a Secure Knot to Lock It In
Once filled, twist the neck of the balloon several times and tie a tight knot at the end. A secure knot keeps the balloon sealed and ensures the water doesn’t leak during freezing. If you’re concerned about slippage or pressure buildup, you can double knot for added peace of mind.

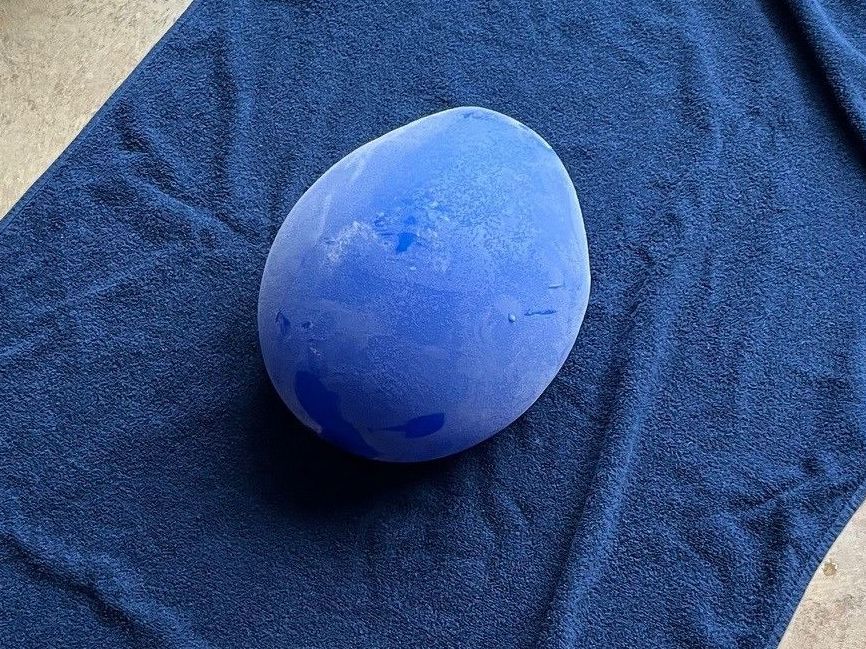
Step 2: Freeze Flat and Let It Set
Use a Solid Surface Underneath
After tying, place the balloon on a flat surface in your freezer. Do not place the balloon directly on wire racks, frozen foods, or open grates. Use a cookie sheet, cutting board, salad bowl, or a piece of cardboard to create a flat base. This keeps the balloon from sagging and helps it freeze evenly, reducing weak spots and preventing deformation or busting before it has a chance to freeze.
Freeze for at Least 48 Hours
Give the balloon a full 48 hours to freeze solid. The dense ice block needs time to form completely, especially when filled to full capacity. A solid freeze ensures the ice breaks properly and holds up inside your cooler. Rushing this step could leave soft spots or partially frozen areas that melt faster and reduce performance.
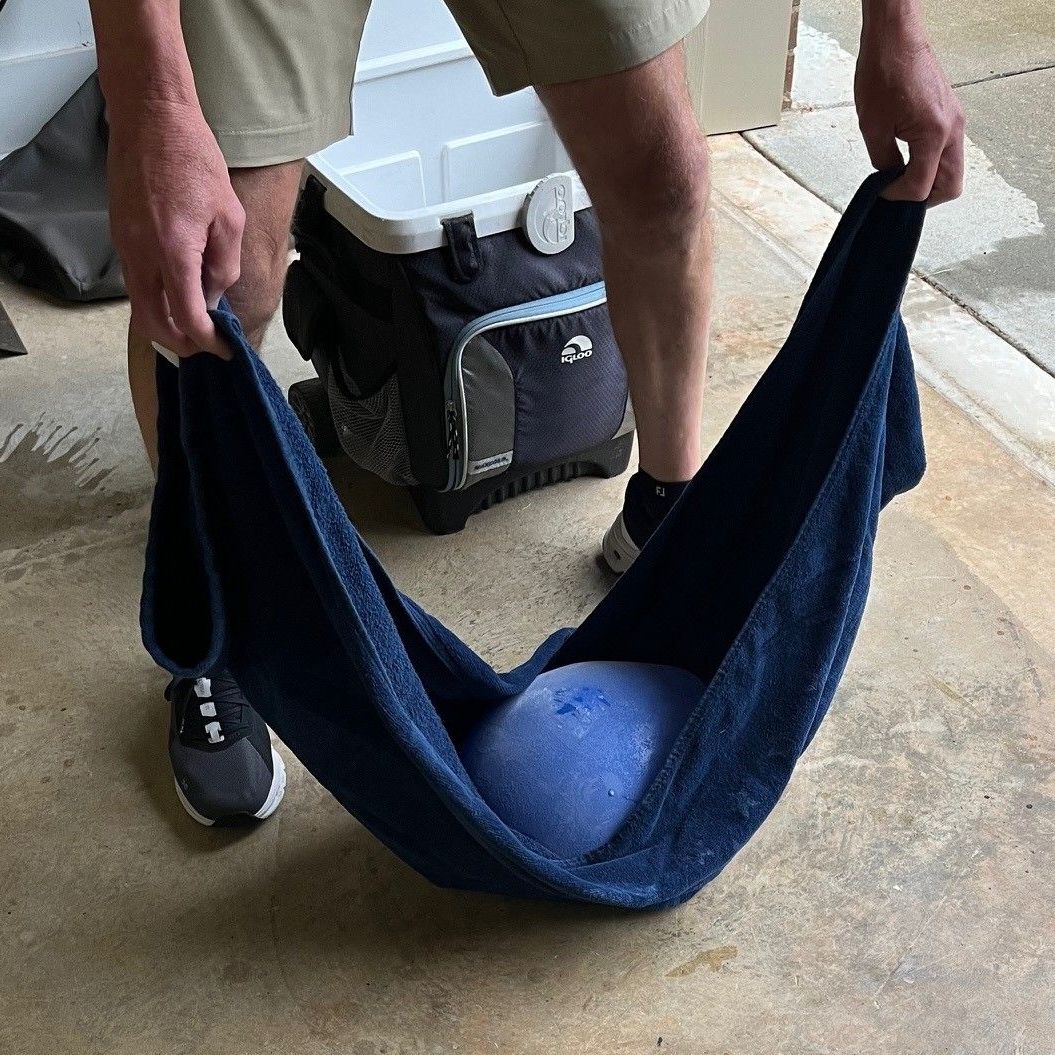
Step 3: Break and Use
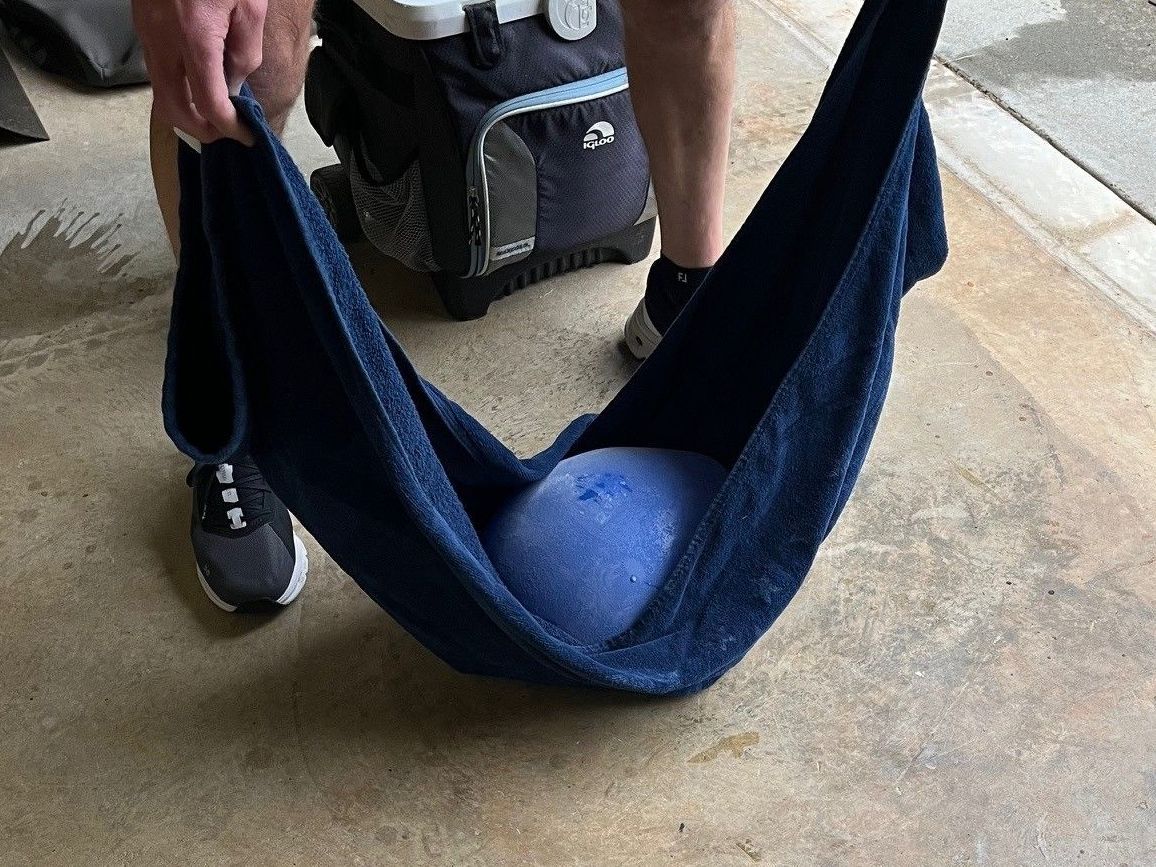
Wrap in a Towel Before Breaking
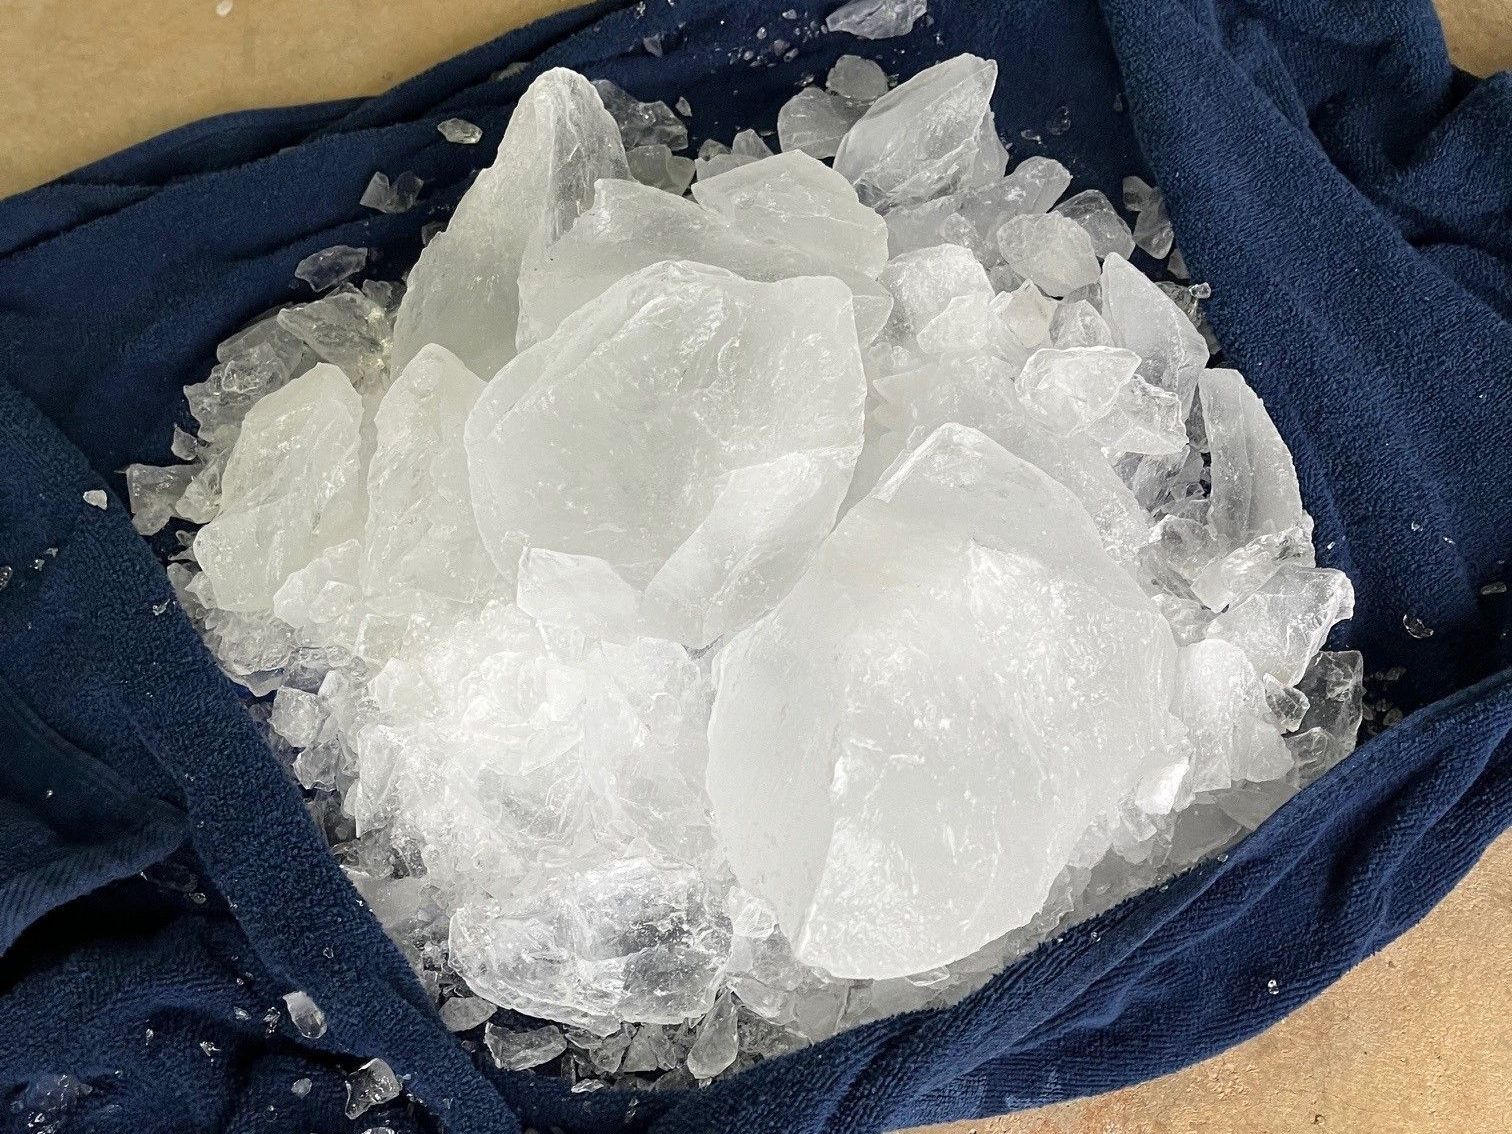
Once fully frozen, wrap the Ice Balloon™ in a thick towel or cloth to protect your hands and control how it breaks. Strike the wrapped balloon firmly against a hard surface like a driveway, rock, or patio. The balloon will split, and the ice will break inside, creating a range of chunk sizes ideal for cooler storage.
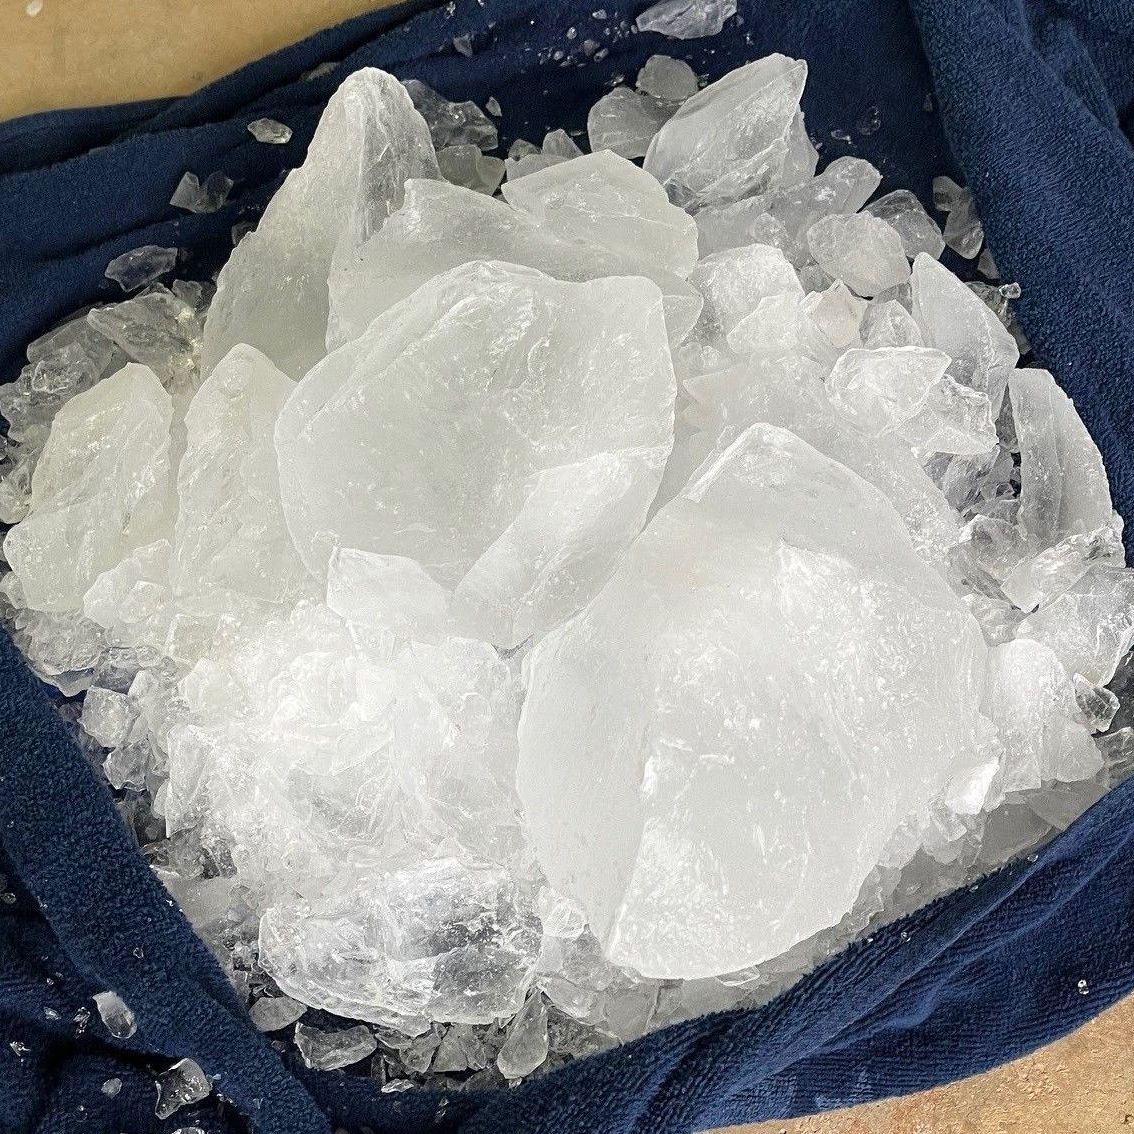
Pour Ice Directly into Cooler
After breaking, unwrap the towel and pour the ice chunks into your cooler. The mix of sizes helps keep everything cold efficiently. Smaller pieces work quickly to reduce the temperature, while larger chunks last longer and hold cold deep into the day. This method makes Ice Balloons™ more effective than store-bought bags and eliminates the mess of melting ice in plastic.
Take the Guesswork Out of Ice Prep
You already know how frustrating it is to run out of ice or waste money on bags that melt before you even get moving. Ice Balloons™ make it easy to plan ahead and pack cold that actually lasts. Fill a few today, freeze them solid, and be ready for whatever’s next.